How to Dry Flowers: 5 Methods Ranked from Easiest to Most Beautiful
Choose a preservation method based on the bouquet, the shape you want to keep, and how much color change you can accept.
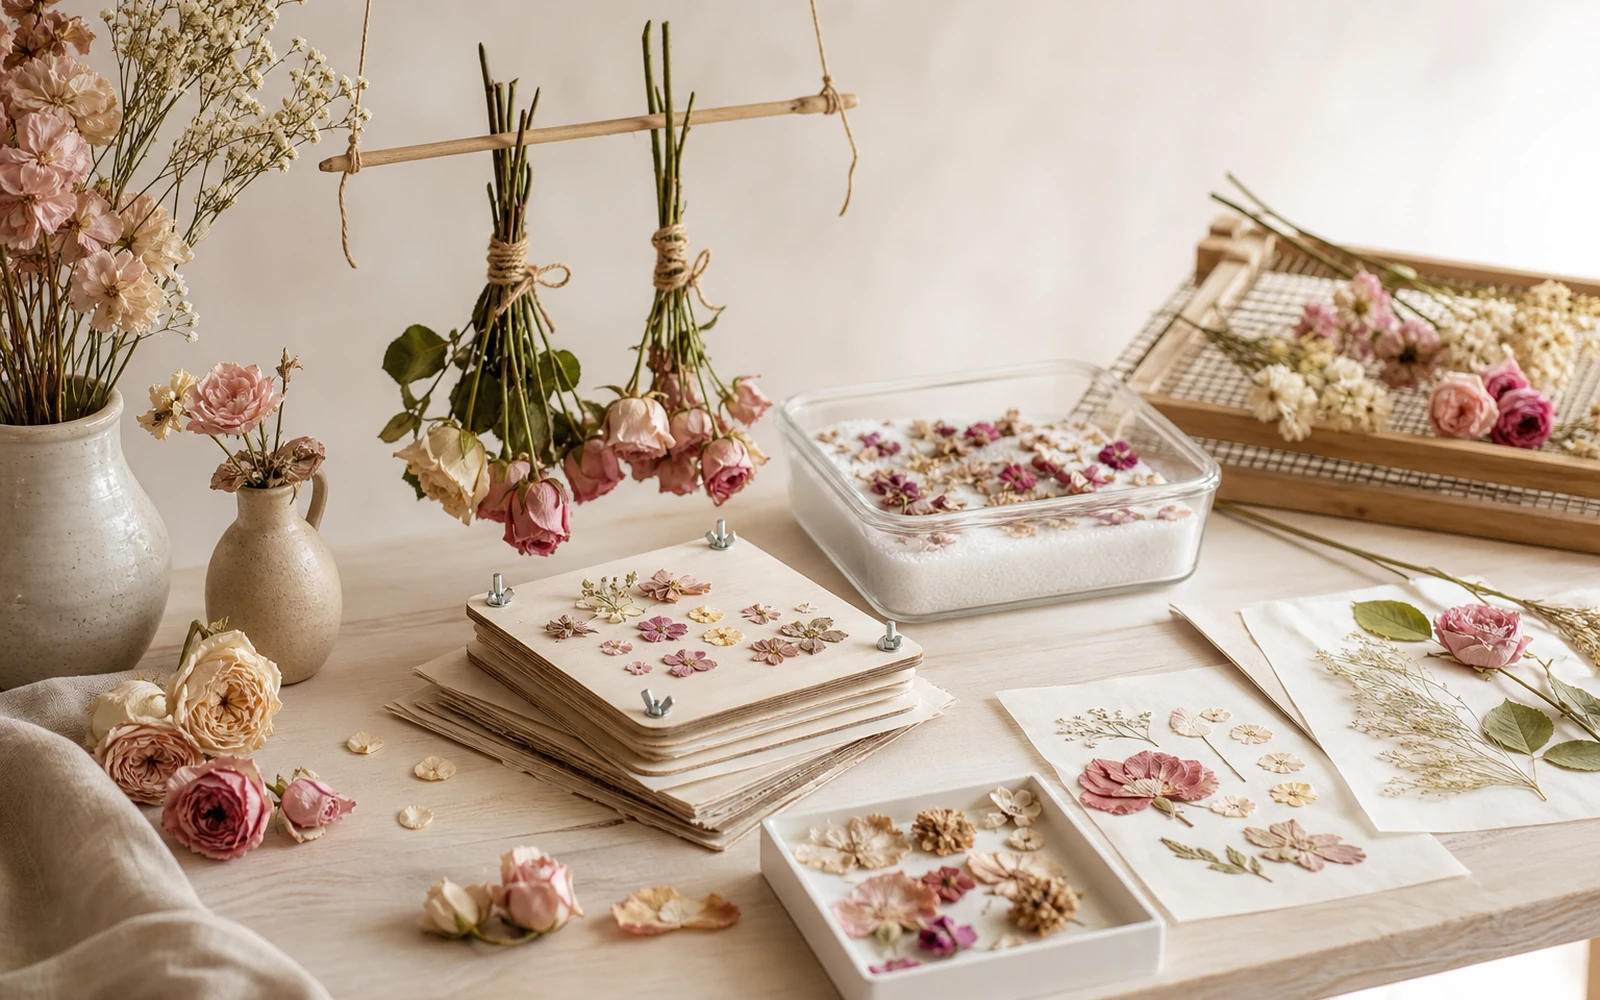
To dry flowers, choose one of five methods based on the keepsake you want: air drying for the easiest loose bunch, pressing for framed flat work, borax-and-cornmeal for an inexpensive dimensional result, microwave drying with silica gel for speed, or room-temperature silica gel for the best home balance of shape and color. If only part of the bouquet will become a keepsake, select sound blooms before they decline and continue caring for the remaining stems with the complete cut-flower care routine. For a complete flat-preservation workflow, use the dedicated flower-pressing guide.
My ranking is blunt because the trade-offs are real:
| Rank | Method | Ease | Keeps 3D shape | Keeps recognizable color | Best result |
|---|---|---|---|---|---|
| 1 | Air drying | Easiest | Fair | Fair to low | A relaxed dried bunch |
| 2 | Pressing | Easy | No—flat by design | Fair | Frames, cards, bookmarks |
| 3 | Borax-and-cornmeal | Moderate | Good | Moderate | Budget dimensional blooms |
| 4 | Microwave plus silica gel | Fast, technique-sensitive | Good | Good | A quick small keepsake |
| 5 | Room-temperature silica gel | Most controlled | Very good | Best of these five | Shadow boxes and focal blooms |
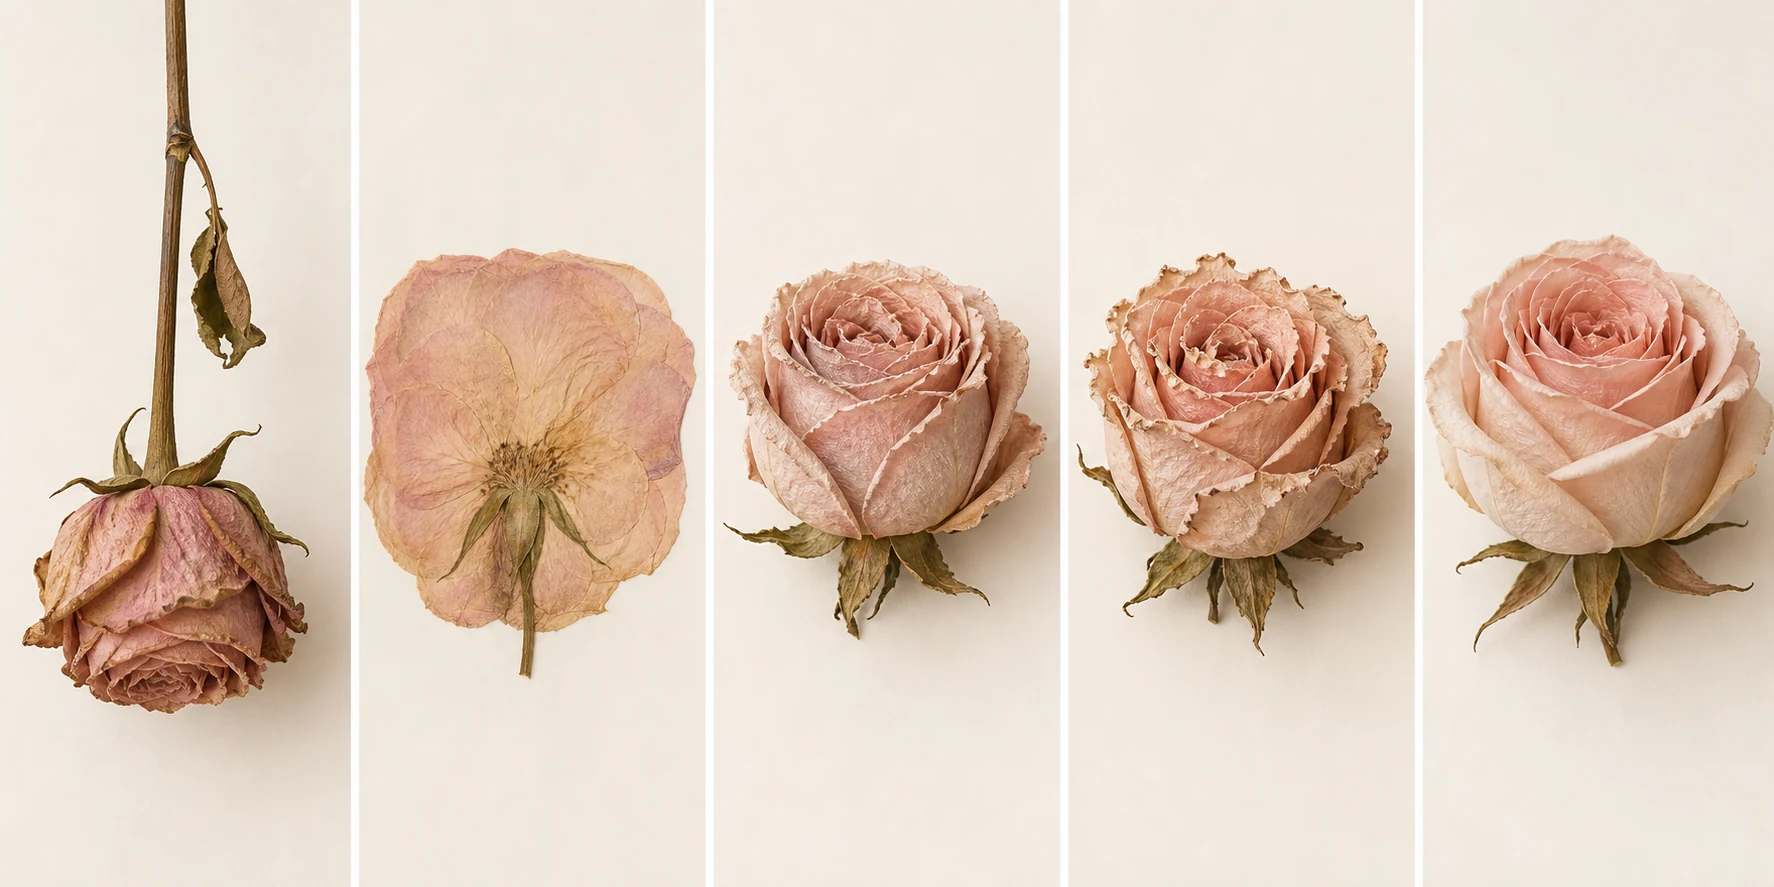
Every method changes the flower. The win is not freezing a bouquet in time; it is choosing which part of its character you want to carry forward. The comparisons below use the method and handling guidance in the University of Florida IFAS preservation guide, cross-checked against university extension instructions for home drying.
If your flowers are still fresh and you are deciding whether to enjoy them first, browse Rosa Fiora’s fresh bouquets. Begin preservation while the stems you want are still sound—before bruising, moisture, or collapse becomes the feature the drying process records.
Before you start, edit the bouquet
Do not push an entire mixed bouquet into one process. Hydrangea, roses, baby’s breath, orchids, tulips, and foliage have different thicknesses and structures. Separate the arrangement into candidates.
Choose flowers that are dry to the touch, clean, and in good condition. Remove visibly moldy or decaying material instead of sealing it into a keepsake. Photograph the original arrangement before taking it apart, then label any bloom tied to a particular memory.
Set aside:
- strong, papery or textural stems for air drying;
- naturally flat faces and individual petals for pressing;
- sturdy dimensional heads for borax-and-cornmeal;
- one nonessential practice bloom for the microwave;
- the most important dimensional blooms for room-temperature silica gel.
That first edit saves more flowers than any clever trick later.
1. Air drying: easiest and most relaxed
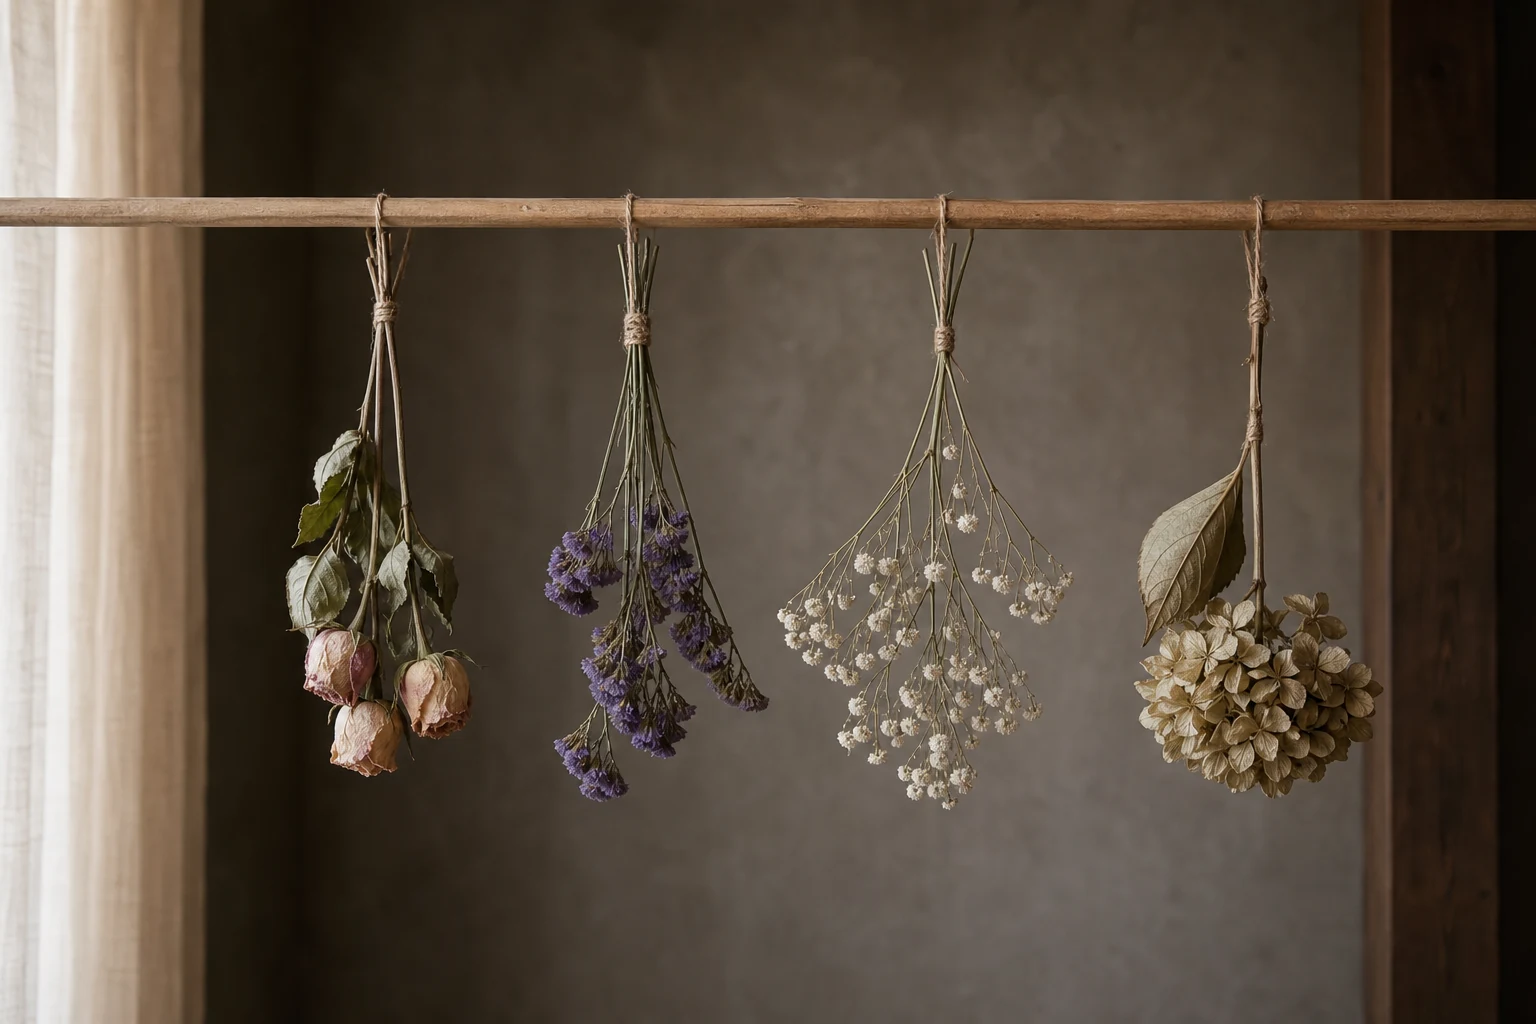
Air drying asks for the least equipment: string or rubber bands, a dark dry place, and moving air. It works beautifully when you welcome a faded, sculptural finish rather than demanding fresh-flower color.
How to do it
- Remove damaged petals and strip excess foliage.
- Divide stems into small, loose bunches so air can move between them.
- Fasten each bunch securely; stems shrink as they lose moisture.
- Hang the flowers upside down in a dark, dry, well-ventilated room.
- Leave them until stems and thick flower parts feel fully dry, commonly one to three weeks depending on the material.
Hydrangea harvested at the right stage, statice, baby’s breath, celosia, grasses, and sturdy rose stems can create a wonderful aged silhouette. Dense, watery flowers are less cooperative. Heads may shrink, petals can curl, and reds or pinks often deepen or shift.
Trade-off: unbeatable ease, modest shape retention, and the most obvious “dried” appearance.
Best use: a loose bunch, wreath, hanging installation, or textural arrangement where movement matters more than perfect bloom geometry.
Do not speed this up with a heater or warm oven. Keep drying and finished stems away from candles, fireplaces, cooktops, and other ignition sources; dried plant material burns readily.
2. Pressing: best when flat is the point
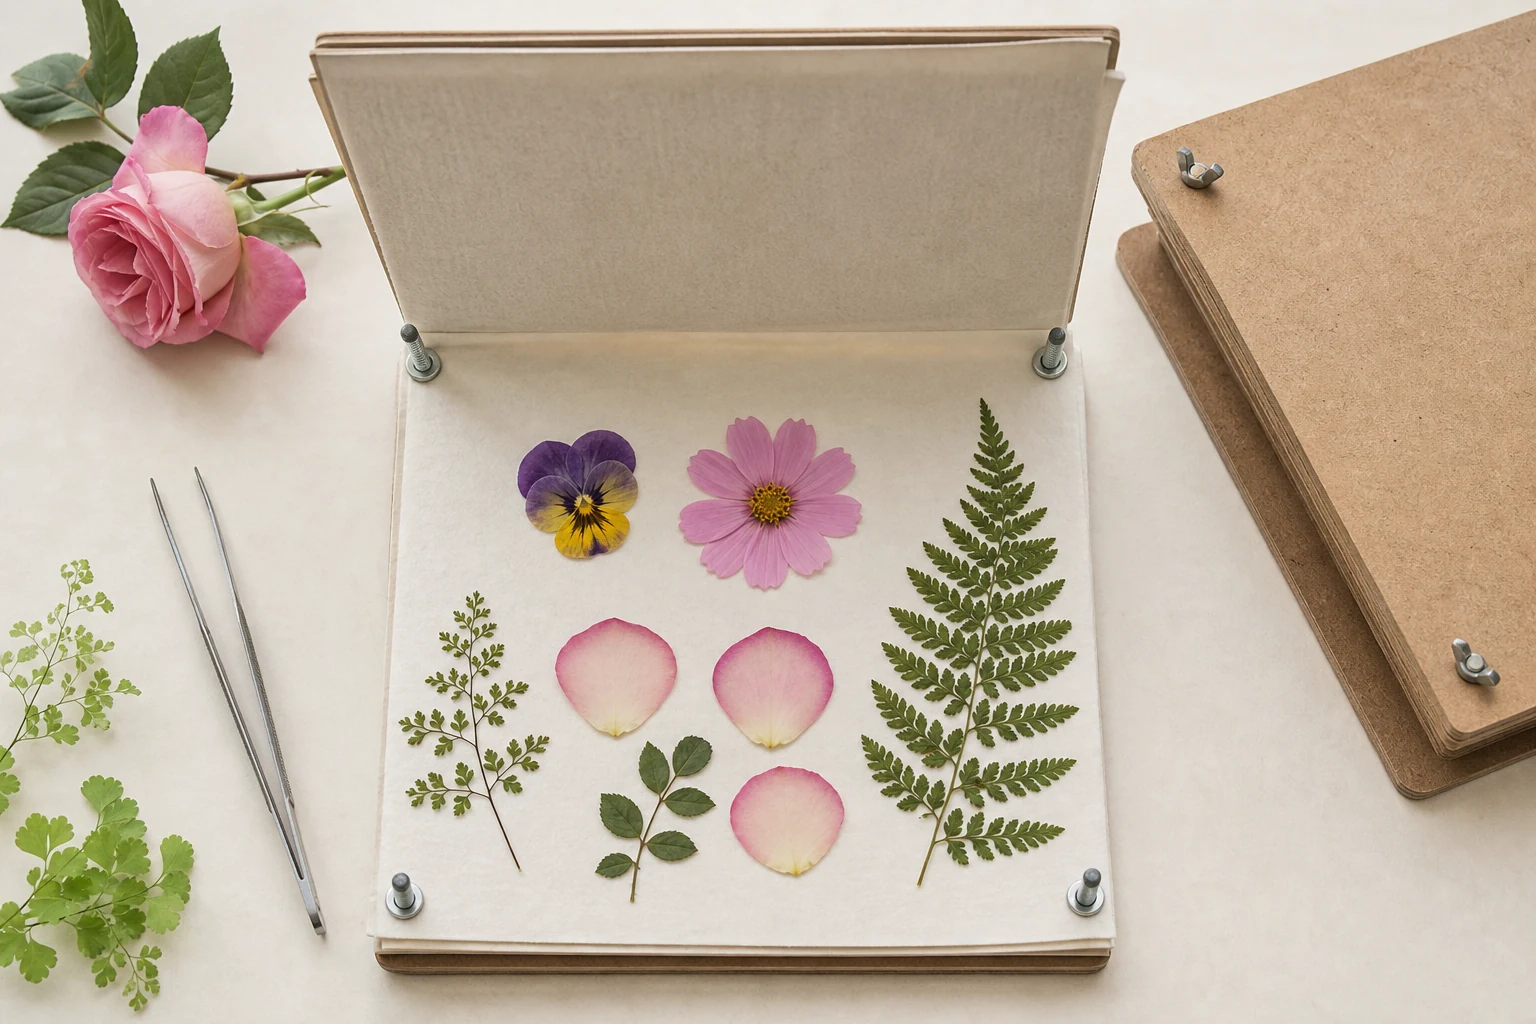
Pressing is not a failed attempt to keep a flower round. It is a different art form. The method turns petals, leaves, and slim flower faces into a flat record that can sit behind glass or on paper.
How to do it
- Choose dry, unblemished flowers with naturally slim profiles, or separate thick blooms into petals.
- Arrange them face down between clean absorbent sheets, leaving space between specimens.
- Place the sheets inside a flower press or beneath a heavy, flat weight.
- Keep the stack dry and undisturbed; replace damp paper if needed.
- Lift only when the flower is fully dry, then handle it with tweezers or the edge of a paper strip.
Daisies, pansies, cosmos, individual rose petals, ferns, and delicate foliage translate well. Thick double flowers can hold moisture and mold before their centers dry.
Trade-off: excellent for display under glass, but all depth is surrendered and color can fade or brown.
Best use: framed art, a wedding invitation, a card, a bookmark, or one significant bloom paired with the note that came with the bouquet.
3. Borax-and-cornmeal: dimensional shape on a budget
A granular drying medium supports petals while pulling moisture from the flower. Borax mixed with cornmeal is less expensive than silica gel and lighter than sand, which can bruise or flatten delicate petals.
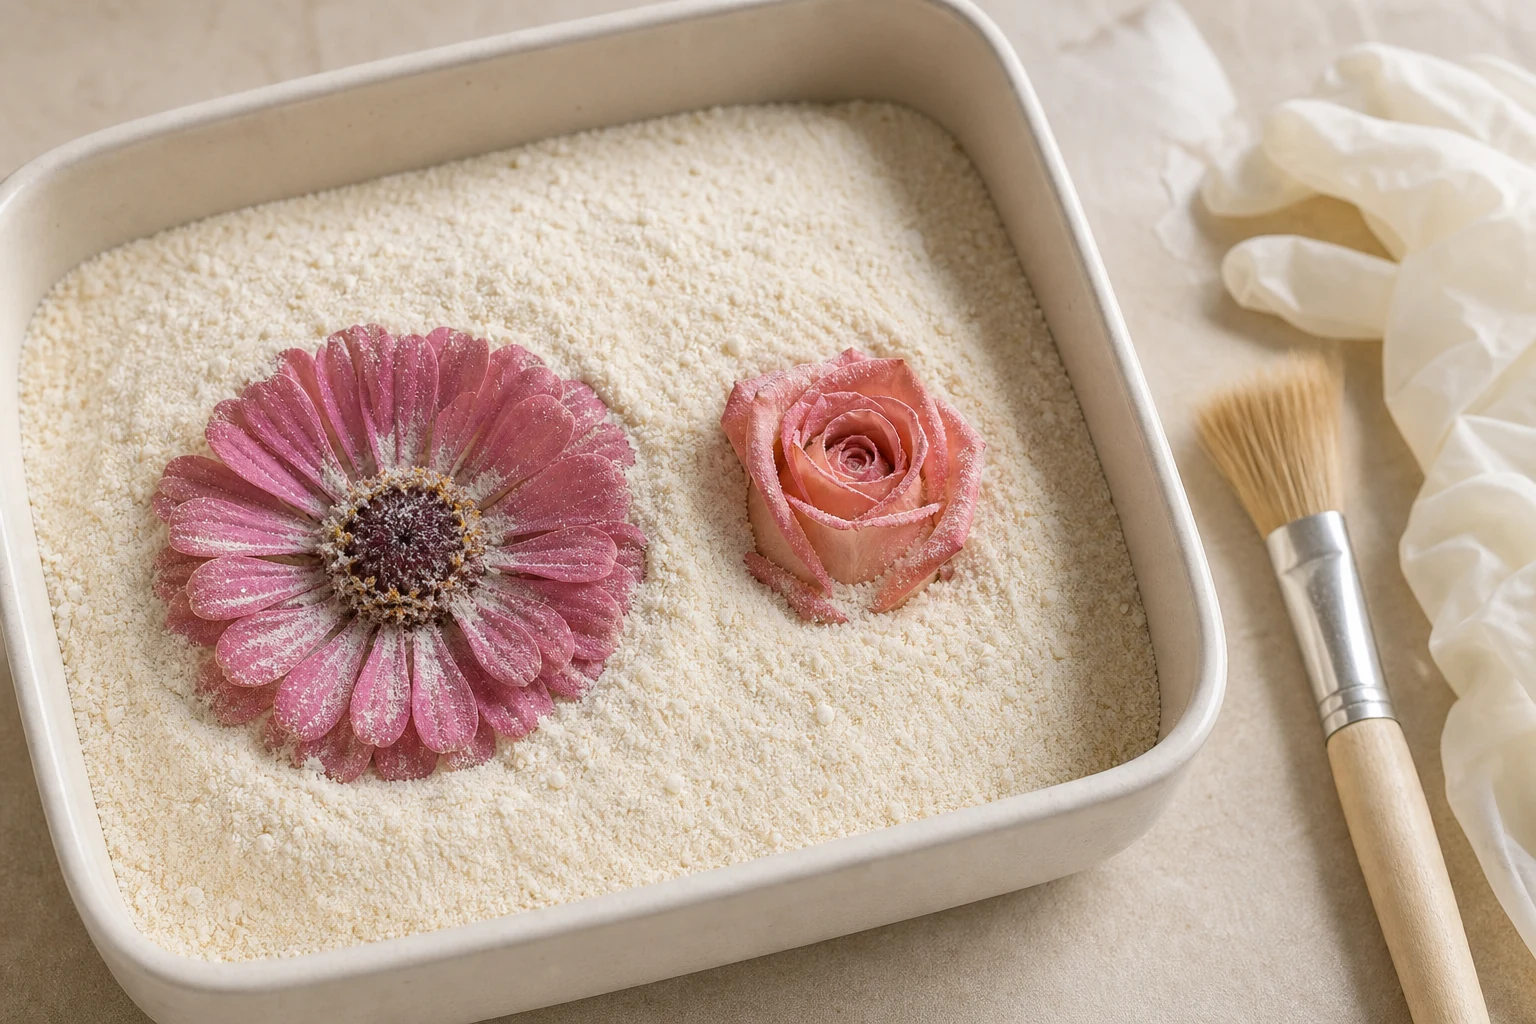
How to do it
- Work in a ventilated area away from food preparation, children, and pets.
- Put a shallow bed of the labeled drying mixture in a dedicated container.
- Trim most of the stem, then position the flower without letting blooms touch.
- Spoon or sift the mixture slowly around the outer petals and into open spaces until the head is supported and covered.
- Check according to the flower’s thickness and your product directions; extension guidance describes roughly one to two weeks for common borax mixtures.
- Pour the medium away gradually and lift the flower from its base. Use a soft dry brush for residue.
Borax dust can irritate eyes, skin, and lungs. Pour slowly, avoid breathing dust, wash your hands, and follow the label; gloves and eye protection are sensible for a dusty job. Pure borax can bleach or damage delicate flowers, which is why I prefer the gentler mixed medium and a trial bloom.
Trade-off: better dimensional support than hanging, but a coarser finish and greater risk of residue, bruising, or color change than silica gel.
Best use: sturdy daisylike heads, small roses, zinnias, and practice pieces where budget matters more than a pristine finish.
4. Microwave plus silica gel: fastest, not most forgiving
The microwave compresses a drying process that normally takes days into minutes. Speed can preserve a fresher look, but it also gives you less room to correct an error. Moisture level, bloom thickness, appliance power, vessel shape, and standing time all change the result.
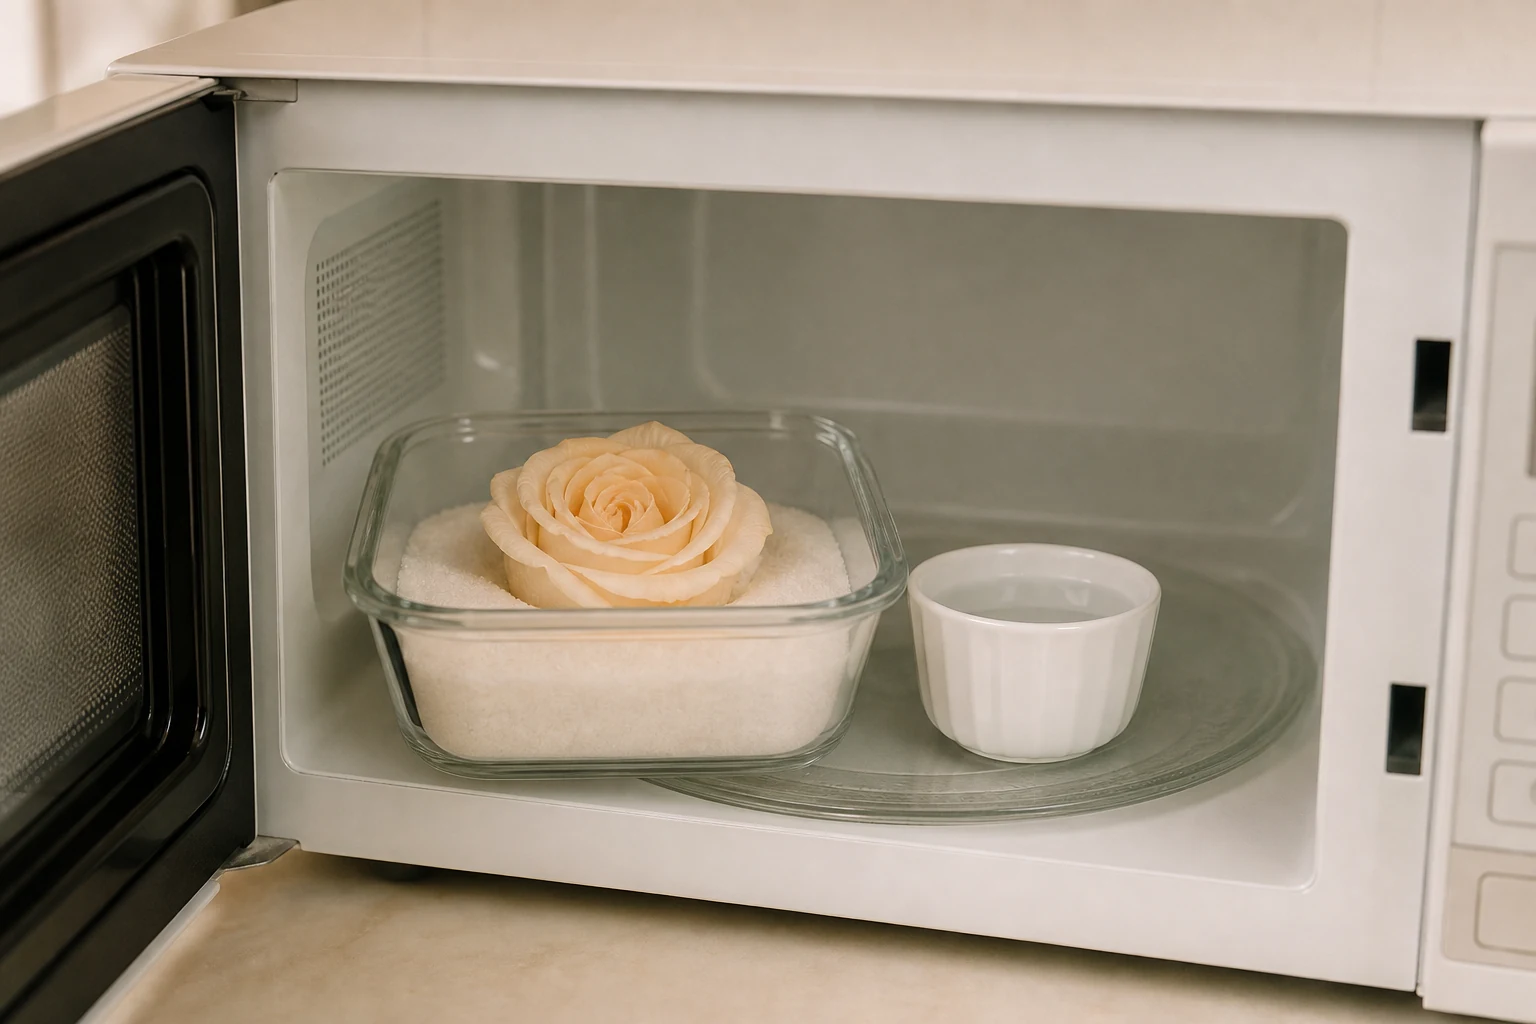
How to do it safely
- Choose a practice flower, not the one irreplaceable bloom.
- Remove all wire, staples, foil, metallic ribbon, and metal fasteners.
- Support the flower in silica gel inside an uncovered microwave-safe glass or paper container.
- Place a small microwave-safe cup of water in the microwave, as the university extension methods direct.
- Use the flower-specific guidance from the desiccant maker and your appliance manual rather than inventing one universal time.
- Let the medium, water, and flower cool completely. Leave the bloom in its standing period before uncovering it.
Never microwave a sealed container or any metal. Hot water and hot drying medium can burn even when the flower looks cool. If your product label does not explicitly permit microwave use, choose the slower silica method instead.
Trade-off: minutes of active drying and good color potential, balanced against the highest technique risk in this ranking.
Best use: one or two small test blooms when time matters and you can afford a learning curve.
5. Room-temperature silica gel: the most beautiful home result
For a dimensional keepsake, this is the method I would choose for the bloom that matters most. Silica gel dries quickly enough to help retain recognizable color and gently supports petals from every side. It costs more than a pantry mixture, but it is reusable when handled according to its label.
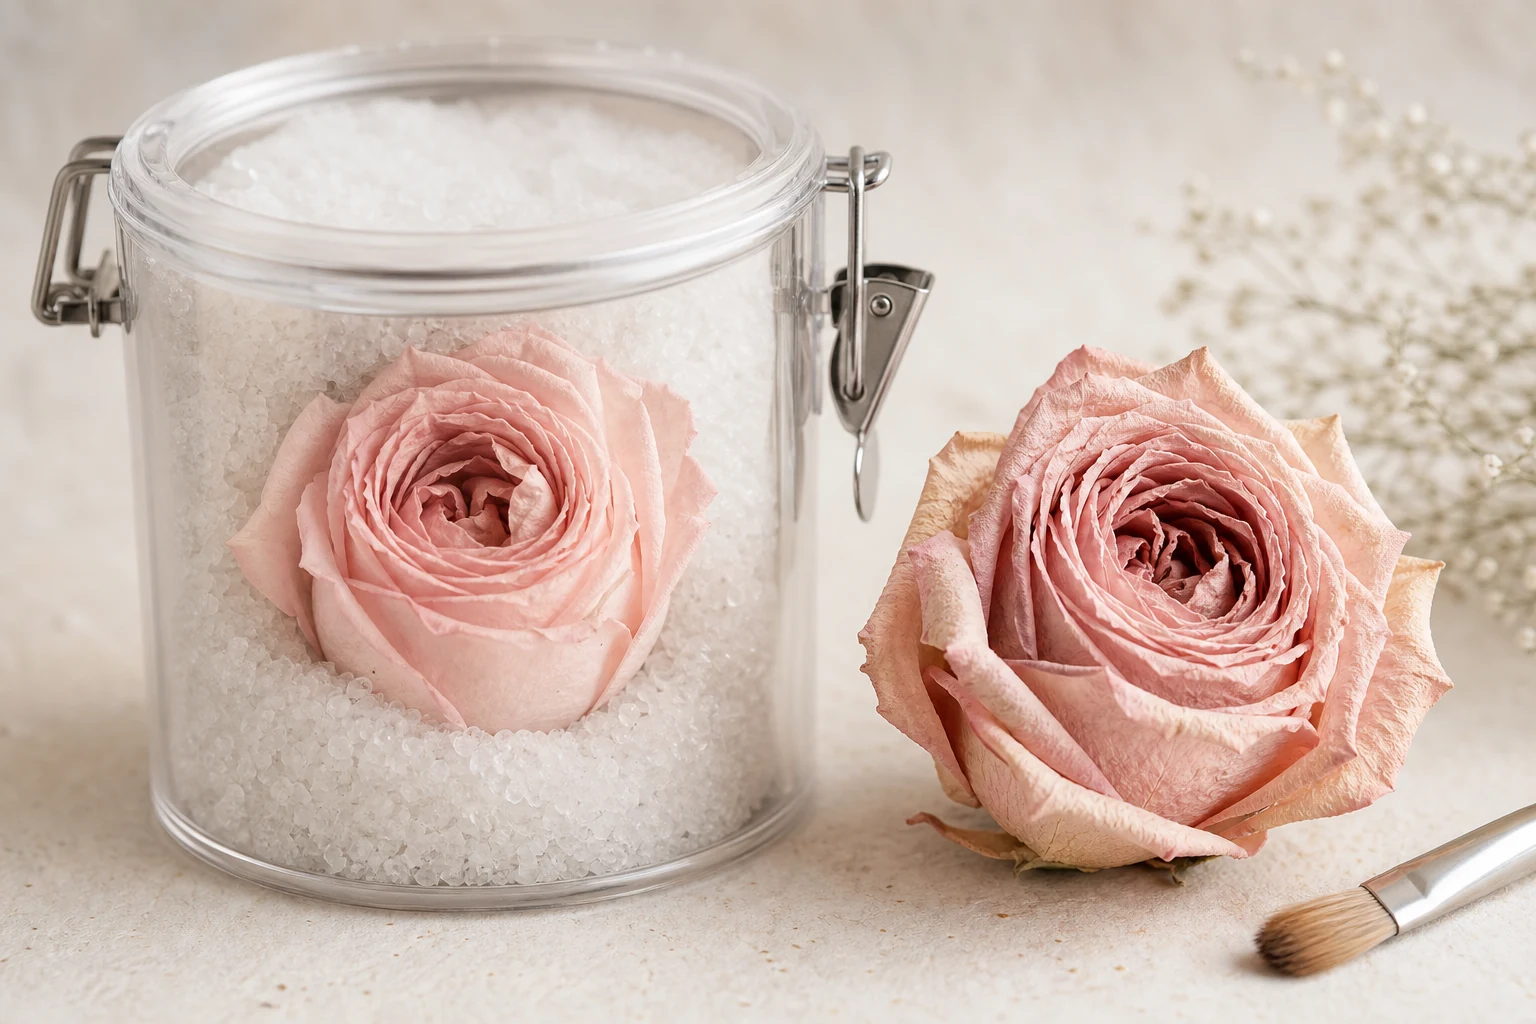
How to do it
- Select a dry flower just before full maturity, with no bruising or damaged petals.
- Trim the stem to an inch or two; plan to add a support later if the finished design needs one.
- Pour a shallow bed of fresh, dry silica gel into an airtight container reserved for craft use.
- Set the flower upright or in the position best suited to its face.
- Pour the crystals slowly around the bloom, guiding petals into their natural positions as you work. Cover the flower completely without crushing it.
- Seal the container. Begin checking at the product’s recommended interval; university guidance gives roughly three to seven days for many flowers, with thick centers taking longest.
- When the bloom is crisp and dry but not brittle, pour the gel away gently. Lift from the base and clean the last crystals with a soft artist’s brush.
Roses, dahlias, zinnias, carnations, and other defined flower heads are strong candidates. Very thin petals can still tear, dense centers can remain damp after outer petals feel dry, and any hidden bruise may darken.
Avoid breathing fine dust. Label the container, keep it away from food, children, and pets, and follow the silica product’s handling and reactivation instructions. Do not treat the tiny “do not eat” packet from unrelated packaging as craft material.
Trade-off: the highest material cost and a careful uncovering process, rewarded with the strongest balance of three-dimensional form and recognizable color among these five home methods.
Best use: a shadow box, cloche, memory display, or one focal flower preserved as the star rather than forcing every stem into the frame.
How I would preserve a mixed bouquet
I would not insist on one uniform finish. I would air-dry the structural stems, press the most expressive petals and leaves, and place two or three focal blooms in silica gel. The finished keepsake could combine a dimensional center with a flat printed card and a small bundle of textural stems.
That approach respects what each flower can become. It also protects the memory if one technique fails: the entire bouquet is never riding on a single container.
Store finished flowers in a dry interior location away from direct sun and ignition sources. Dust with a soft brush, support brittle stems, and expect color to continue aging. A dried bouquet becomes beautiful in a new tense.
If the bouquet in your hands marks a wedding, anniversary, or another moment worth designing around, contact Rosa Fiora about a floral consultation. We can help you begin with an arrangement whose shape, focal flowers, and palette feel worthy of the memory you plan to keep.